Lapidary

Lapidary

Marksheet Design with MS Publisher easy like MS Word

If you are a teacher or official associated with academic institution then create Certificate, Marksheets, admit cards very easily by own. Usung MS Publisher you can creat all of this. If you know MS Word and MS Excel you can do it easily. In this article I have described Marksheet Design.

Simplest way to create a marksheet/ Certificates / Admit Card. If you know MS word you can do very easily with MS Publisher

  • Ready Student Database:
    1. At first ready student database in Excel format or you may collect data in Google sheet and convert in Excel format.
  • Design a marksheet:
    • Design a marksheet in Microsoft Publisher. Use logo and make transparent background.
  • Design a marksheet:  In the mail merge option of Microsoft publisher ________ Choose the “Existing list” option under the select recipient menu. Here selects the student database saved in excel format. 
  • Insert Marge Field:
    1. As par the design of the marksheet insert various field under “Insert marge Field” of mail marge menu those you want to appeared in the marksheet, like 
  • Name of The Trainee 
  • Roll Number
  • Standard 
  • Math Marks 
  • English Marks 
  • Physics Marks 
  • Chemistry Marks 
  • Biology 
  • Total Marks Obtained 
  • Percentage 
  • Result
  • Date of The Publication

.

  • Preview Result: Click on Preview Result under mail marge menu
  • Print All Mark Sheets:
    • After that click on preview result. Then click on finish and Marge. click on Marge to new publication. Here you will find individual marksheets if you want to make any modifications individually then do it. After that print the marksheets

The simple steps to merge data in MS Publisher from Excel data database (Mail Marge):

  1. Prepare the Excel spreadsheet: The first step is to prepare the Excel spreadsheet with the data that you want to use for your mail merge. Make sure that the spreadsheet has a header row that contains the names of the fields that you want to merge into your Publisher document.

  2. Create a new Publisher document: Open MS Publisher and create a new document. Choose the type of document you want to create, such as a letter, postcard, or brochure.

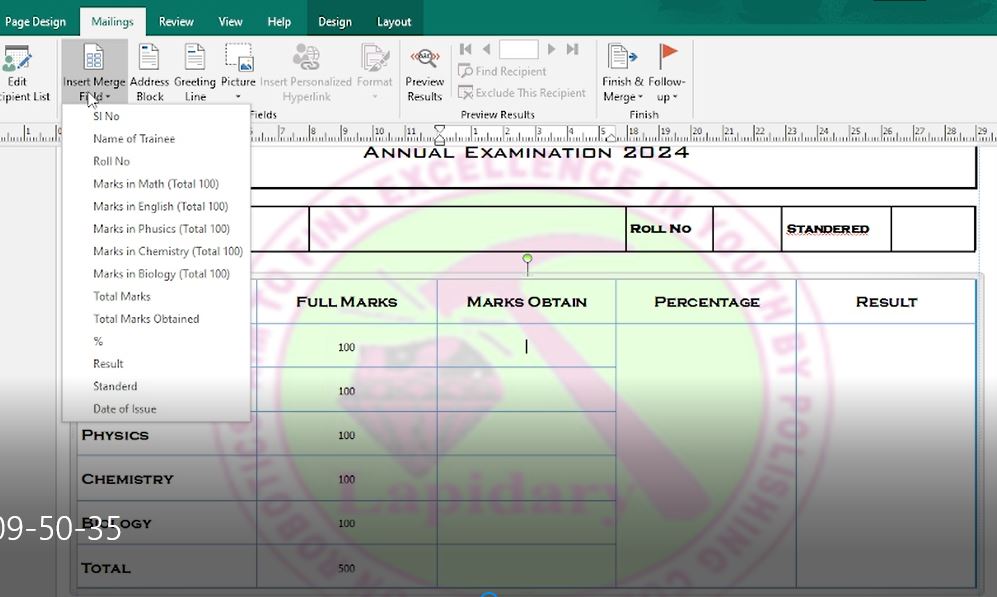
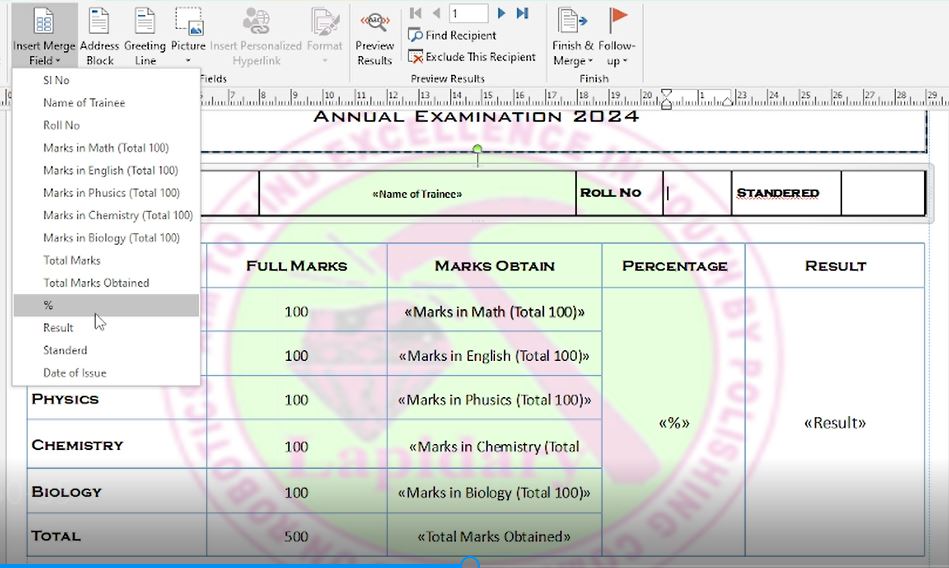
  3. Insert merge fields: Place your cursor where you want to insert a merge field, such as the recipient’s name or address. Go to the “Mailings” tab and click on “Insert Merge Field.” From the dropdown menu, select the field you want to insert, such as “First Name” or “Address Line 1.”

  4. Connect to Excel spreadsheet: Go to the “Mailings” tab and click on “Select Recipients.” From the dropdown menu, select “Use Existing List.” Navigate to and select the Excel spreadsheet that you want to use.

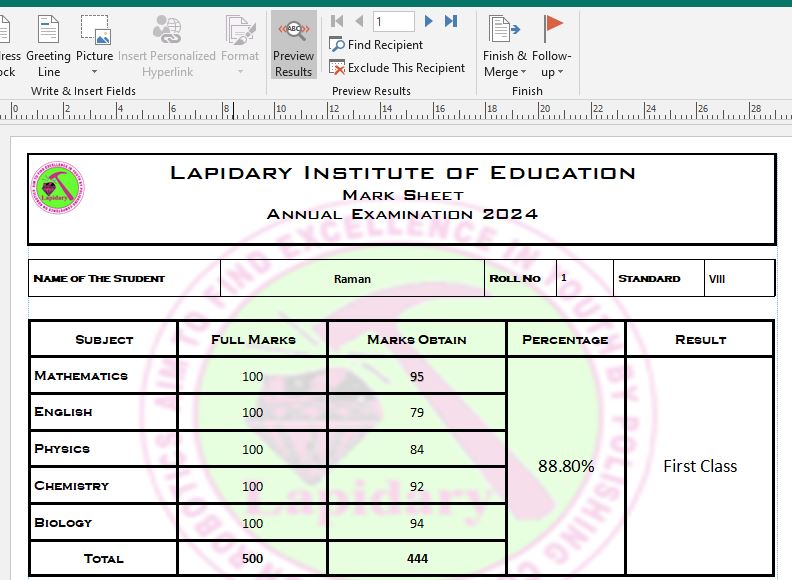
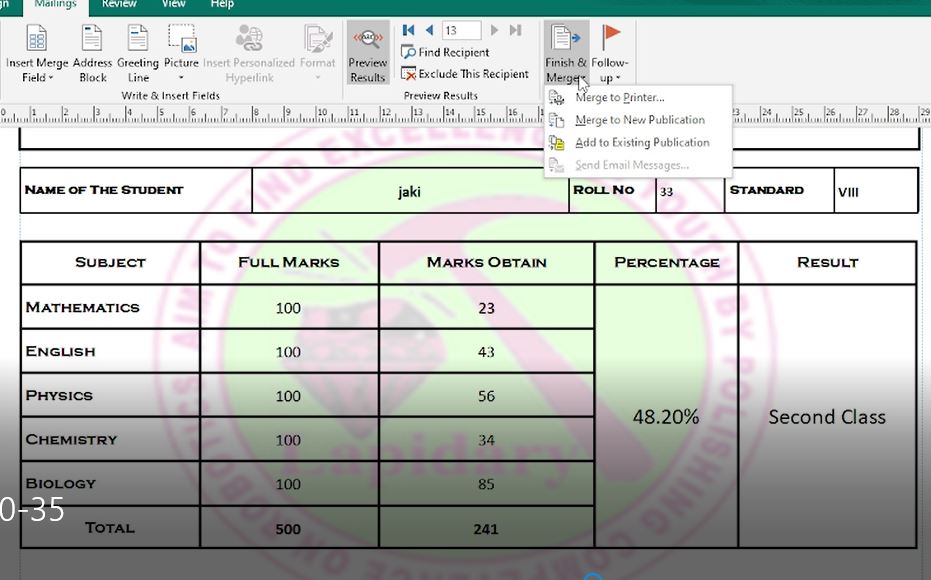
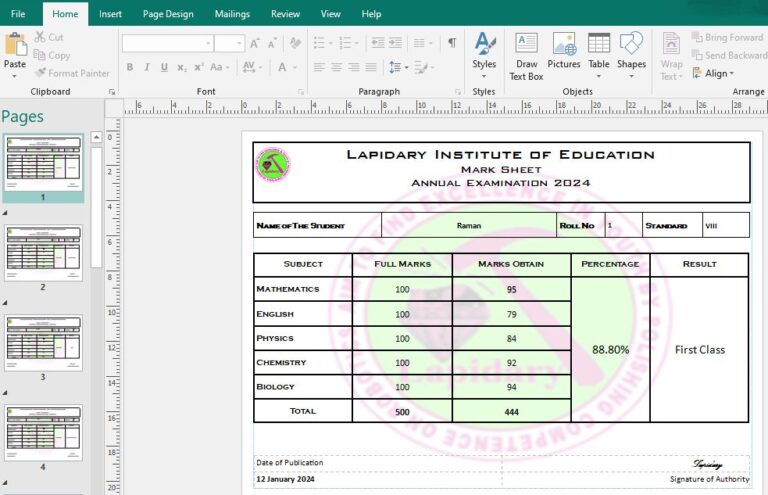
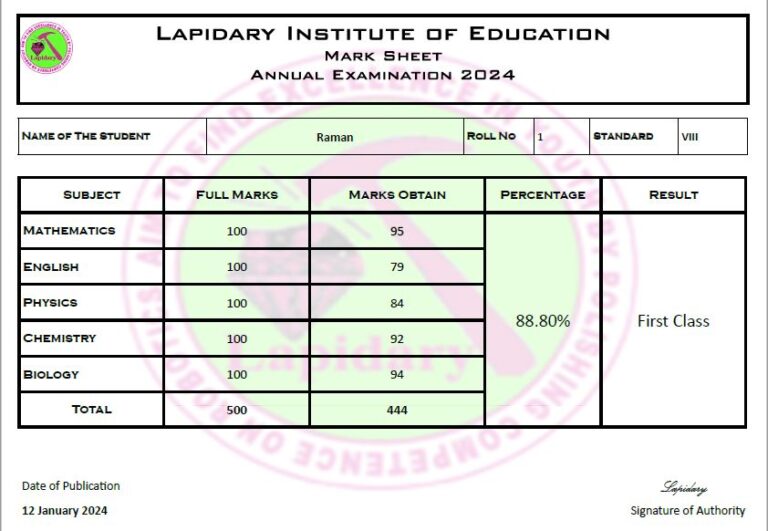
  5. Preview and complete the merge: Go to the “Mailings” tab and click on “Preview Results” to check how your merge fields will look in the final document. Once you’re satisfied, click on “Finish & Merge” and choose the option that best suits your needs, such as printing or emailing the merged documents.

Leave a Comment

Your email address will not be published. Required fields are marked *